Let’s just state the obvious here: there is no such thing, really, as a mini cherpumple, because there is absolutely nothing at all to be found about a cherpumple that can be classified as “mini.” The cherpumple, as some of you may recall, is a three-layer, six-part dessert, dreamed up by humorist Charles Phoenix. Three layers of cake encase three different types of pie, which are then stacked atop one another and spackled with cream cheese frosting. It is, just as Phoenix dreamed it, the turducken of desserts.


When I first wrote about the cherpumple, I was surprised to encounter some rather enthusiastic responses to the dessert. Whereas I found the very idea of the cherpumple to be an affront to the very basic tenets of food, every single person I talked to about the cherpumple thought it was fascinating. You must make a cherpumple, I was told. It is your destiny to bring a cherpumple to life.


But I had no interest in actually making a cherpumple. Why on earth would I ruin three good pies and three good layers of cake by Frankensteining them together and trying to make them live as one? That’s crazy. But then, the more I thought about it, the more I wondered if it was possible to make a cherpumple that was not so crazy. I mean, it would still be crazy—it is the turducken of desserts, after all—but could I make a cherpumple that was a tad more subdued, a bit less depraved, and, most importantly, something that people would actually want to eat because it was delicious, not because it was a fascinating study in the psychology of excess?


There was only one way to find out. My first order of business was to find a way to scale down the cherpumple so that it was still a hybrid of desserts, but not an exercise in terror. Deciding to limit the dessert to a single layer of entombment, I whittled the components of a classic cherpumple down to its best elements: pie and spice cake. In this version, a handsome pie is constructed with a strata of pumpkin butter, sautéed apples, and tart, chunky cherry preserves. The pie is then baked into a positively enormous spice cake, then slathered with tangy cream cheese frosting. While still decidedly decadent and ever-so-slightly intimidating, the finished product is not the towering beast of the original, but rather a slightly more tame and, dare I say it, refined animal.

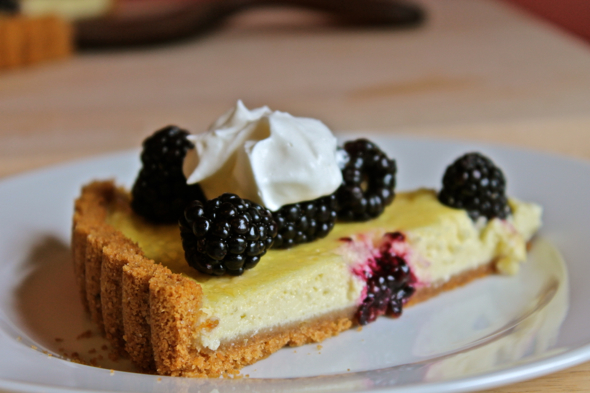
Okay, no. So, it’s not refined in the least, but it is completely and totally edible, which came as a total shock to me. Somehow the three pie flavors meld deliciously, and the spice cake is a perfect pairing with the autumnal flavors of the pie. I can’t believe I am saying this, but the cherpumple, at least in mini form, is not merely the punchline to a joke of excess and revulsion. It’s actually tasty, and if you’re looking to feed and impress an enormous crowd of people this holiday season, I’d have to recommend giving this baby a try. Maybe only once, though. A cherpumple is not meant to be an annual affair. It’s like the Halley’s Comet of desserts, meant to be experienced, if lucky, only once in a lifetime.

Last Year: Salted Chocolate Hazelnut Tart
Mini Cherpumple Recipe
For the pie:
Pie crust for a 2-layer pie (this is my favorite pie crust recipe)
3 cups of peeled and sliced tart apples (I used 3 medium Granny Smith apples)
1 teaspoon unsalted butter
½ teaspoon dark brown sugar
pinch of cinnamon
1 ½ cups pumpkin butter
¾ cup chunky sour cherry preserves
Preheat oven to 425 degrees Fahrenheit. Line a heavy sheet pan with foil, then place on the lower middle rack of the oven.
In a medium saucepan or skillet, melt butter over medium heat. Add sliced apples, brown sugar, and cinnamon, and stir to combine. Reduce heat to low, and sauté apples, stirring occasionally, until they have softened a bit and released some of their juices, about 5 minutes. Remove apples from heat and allow to cool to room temperature.
Roll out half of pie dough and line the bottom of an 8-inch or 9-inch pie plate. Trim the edges of the dough so nothing falls over the edges of the pie plate. Spread the bottom of the pie with the pumpkin butter, then sprinkle over the cooled, sautéed apples. Dot the top of the apples with the cherry preserves. Roll out the second half of the dough and gently place over the top of the pie. Trim the edges of the dough so nothing hangs over the edges, then crimp the top and bottom crusts together. Cut half a dozen slashes on the top crust, to allow steam to escape while baking.
Bake the pie on the foil-lined baking sheet for 25 minutes, until the edges of the crust are just beginning to brown. Rotate the pie on the baking sheet, lower the oven heat to 375 degrees Fahrenheit, then bake for an additional 25 to 30 minutes, until the crust is deeply browned and the pie’s juices are bubbling out of the slashes on top of the crust.
Remove pie from oven and cool completely.
For the cake:
3 cups unbleached all-purpose flour
1 ½ teaspoons baking soda
1 teaspoon salt
2 teaspoons cinnamon
1 teaspoon allspice
1 teaspoon ginger
¼ teaspoon cardamom
1/8 teaspoon nutmeg
2 sticks (1 cup) unsalted butter, softened at room temperature
1 ½ cups granulated sugar
2 large eggs, at room temperature
2 teaspoons pure vanilla extract
2 cups buttermilk, at room temperature
Preheat oven to 350 degrees Fahrenheit. Arrange an oven rack to the lower middle position. Grease and flour the sides and bottom of a 10-inch springform pan, then line the bottom with a round of parchment paper.
Sift together flour, baking soda, salt, and ground spices, then set aside.
In a large bowl, or in the bowl of a stand mixer fitted with the paddle attachment, cream the butter until light, about 3 minutes. Add the sugar, and beat at high speed until fluffy, about 3 to 4 minutes, scraping down the sides of the bowl as necessary. With the mixer on medium high speed, beat in the eggs, one at a time, scraping down the sides of the bowl to incorporate everything. Beat in the vanilla.
Reduce mixer speed to low. Add in 1/3 of the flour and spice mixture, and mix until just combined. Add in half of the buttermilk, then beat until just combined. Continue adding in half of the remaining flour mixture, the remaining buttermilk, then the last of the flour mixture, beating after each addition until the mixture is just combined. Scrape down the sides and bottom of the bowl, then give everything one last mix for about 10 seconds.
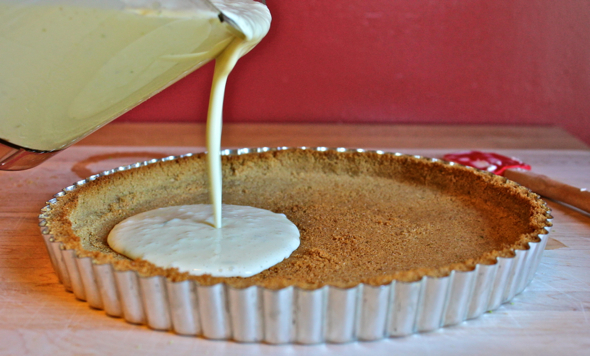
Pour enough cake batter into the prepared springform pan to just cover the bottom. Release the cooled pie from its pan (I ran a very small and flexible spatula around the inside perimeter of the pie pan before turning the pie out onto my open palm), then place the pie, right-side up, on the thin later of cake batter in the springform pan. Very lightly press the pie into the batter, just to secure it in place. Pour the rest of the cake batter over and around the pie, covering as much territory as evenly as possible. Smooth the top of the cake batter.
Place cake on a baking sheet, then bake on the lower middle rack of the oven for anywhere from 55 to 75 minutes. You want to start checking your cake for doneness at around the 55 minute mark, but do not be surprised if your cake takes the full 75 minutes to bake. The reason there can be much a variable in baking time is due to the fact that springform pan thicknesses very, oven temperatures can vary, and sometimes things just bake up sort of weird, being as though you are baking a heavy pie into an enormous cake. Just test your cake with a cake tester in several places on the cake, looking for the tester to emerge with just a few moist crumbs attached. It might cause the top of the cake to get rather crisp in places, but that is all right. What you do not want is a cake that is done on top and runny in the middle and bottom, so bake this cake with diligence.
When the cake is done, allow it to cool, still in its pan, on a wire rack for at least 1 hour. Then, remove springform sides of pan and allow cake to cool completely. This is a super dense cake, so cooling it completely can take several hours.
When the cake has cooled completely, very gently invert the cake onto another wire rack or a large platter, then remove the springform bottom (you may need to loosen it first by gently running a thin knife in between the cake and the springform bottom) and peel off the parchment paper. Very carefully invert the cake back onto a serving platter. You are now ready to frost the cake.
Cream Cheese Frosting
From The America’s Test Kitchen Family Baking Book
12 ounces cream cheese, softened at room temperature
6 tablespoons of unsalted butter, softened at room temperature
4 teaspoons sour cream
1 teaspoon vanilla extract
¼ teaspoon salt
1 ¾ cups confectioner’s sugar
In a large bowl, or in the bowl of a standing mixer fitted with the paddle attachment, beat together the cream cheese, butter, sour cream, vanilla, and salt on high speed until light smooth, about 2 to 4 minutes. Reduce mixer speed to medium low, then slowly add in the confectioner’s sugar. Beat for about 4 minutes until the confectioner’s sugar is completely incorporated, then increase mixer speed to medium high and beat frosting until it is light and fluffy, about 5 minutes.
Frost the cake when it is completely cool, using every last bit of the frosting available.
Mini cherpumple will serve an entire army of kitch-loving dessert fans.
Tags: Charles Phoenix, cherpumple, food, Go Mighty, holidays, recipe