When you know a person who likes to make cakes as much as I do, and I offer to make you a birthday cake, your choice of cake can sometimes require a bit more intense concentration and debate than ever thought logical or necessary.

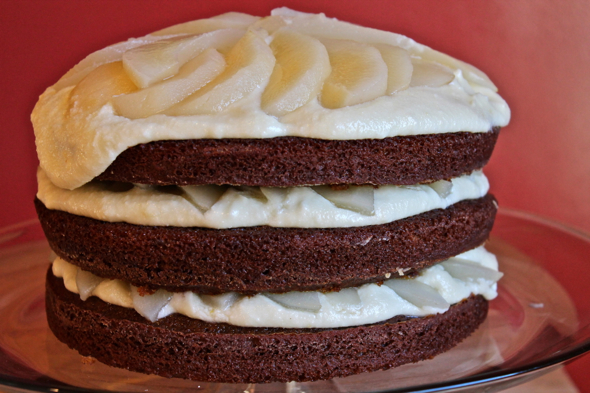
If you can’t decide on a cake and tell me to decide for you, you may end up here: spicy dark gingerbread, layered with smooth mascarpone cream, and studded with juicy poached pears. Just fancy enough to satisfy my desire to make a spectacular cake for a special birthday, but also bursting with classic, humble flavors that provide the cake with a bit of comfortable familiarity. This cake may look like a big burst of song and dance, but it tastes like a giant, loving hug. Which makes for a very happy birthday for anyone.
Last Year: Crisp and Hearty Homemade Granola Bars
Gingerbread Cake with Poached Pears and Mascarpone Cream
Gingerbread Cake
Adapted from Epicurious
1 cup Guinness extra stout or dark beer
1 cup mild-colored (light) molasses
1 1/2 teaspoons baking soda
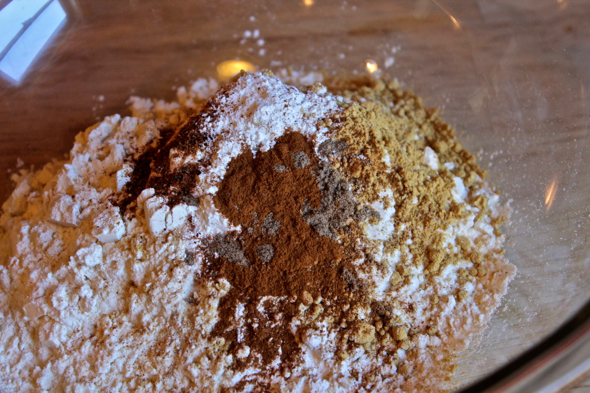
2 cups all purpose flour
2 tablespoons ground ginger
1 1/2 teaspoons baking powder
3/4 teaspoon ground cinnamon
1/4 teaspoon ground nutmeg
1/8 teaspoon ground cardamom
3 large eggs, at room temperature
1/3 cup sugar
1/3 cup (packed) dark brown sugar
3/4 cup vegetable oil
1 tablespoon minced peeled fresh ginger
Preheat oven to 350°F. Butter and flour three 8-inch-diameter cake pans. Bring stout and molasses to boil in heavy medium saucepan over high heat. Remove from heat; stir in baking soda (mixture will foam up, so be prepared to move pan to the sink if the foam threatens to escape over the sides of the pan). Let stand 1 hour to cool completely.
Whisk flour and next 5 ingredients in large bowl to blend. In a separate medium bowl, whisk eggs and both sugars to blend. Whisk in oil, then stout mixture. Gradually whisk stout-egg mixture into flour mixture. Stir in fresh ginger.
Divide batter among prepared pans. Bake until tester inserted into centers of cakes comes out clean, about 25 minutes. Cool cakes in pans 15 minutes. Invert cakes onto racks; cool. (Can be made 1 day ahead. Wrap each cake separately in plastic and keep at room temperature.)
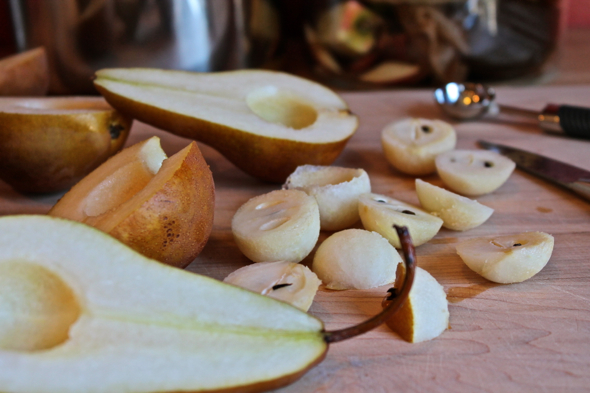
Poached Pears
4 cups water
¼ cup sugar
juice from 1 lemon
3 medium-size firm but ripe Bosc pears, peeled, sliced in half, core and stems removed
Bring water, sugar, and lemon juice to boil in large saucepan over medium-high heat, stirring until sugar dissolves. Add pears. Reduce heat to medium and simmer until pears are very tender, turning occasionally, about 20 minutes. Cool pears in syrup. You can poach the pears up to a day ahead if you like, then store the pears, still in their poaching liquid, covered in the refrigerator.
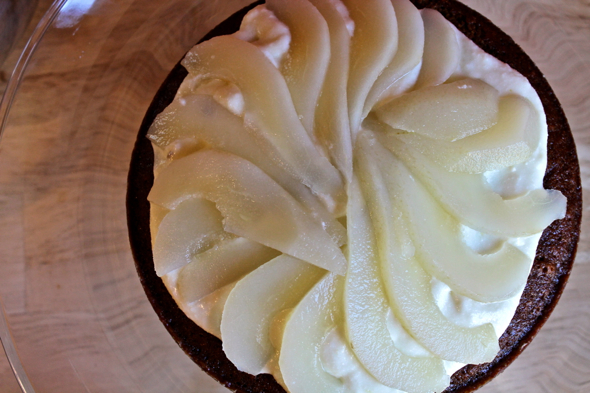
When you are ready to use the pears, drain them thoroughly in a colander or strainer, discarding the liquid. Slice the pears lengthwise into thin strips that can be fanned out in a circle on top of the cake layers.
Mascarpone Cream
8 ounces mascarpone cheese
4 ounces cream cheese, at room temperature
4 tablespoons (1/2 stick) unsalted butter, at room temperature
1 ½ cups powdered sugar
½ teaspoon pure vanilla extract
pinch of salt
In a large bowl, or in the bowl of a standing mixer fitted with the paddle attachment, combine mascarpone, cream cheese, and butter. Beat on high speed until light and creamy, about 3 to 5 minutes. Slowly add in powdered sugar, ½ cup at a time, beating until combined. Add the vanilla and salt and beat on high speed for about 3 minutes, until everything is smooth, creamy, and fully combined.
To assemble cake, Place one cake layer on a large platter. Spread on 1/3 of the mascarpone cream, leaving clear about a ½-inch edge. Cover the cream with a concentric circle of pear slices. Place another layer of cake on top, cover with half of remaining cream, then cover with another circle of pear slices. Repeat for final cake layer.
Because the mascarpone cream and poached pears do not provide the most stable structure, it is a good idea to stabilize the cake with a few wooden dowels (or trimmed wooden chopsticks, or trimmed wooden skewers). Simply clip 3 dowels or skewers to the proper height, then place them in a circle in roughly the middle 2/3 of the cake. This will keep your cake layers from sliding off of one another. When you are cutting and serving the cake, simply remove each skewer as you get to it.