Tag Archives: Indian

Green Tomato Pakoras

30 Sep

IMG_9524

IMG_9517

Our tomato plants were still going strong as of about a week and a half ago, but with the cold weather sitting on top of us, it is obvious that the plump green tomatoes holding onto each vine have absolutely no chance of ever ripening. This, of course, is not a bad thing, particularly if you are as big of a fan of green tomatoes as I am.

IMG_9518

I’ve made a few types of pakoras over the years, and I have to admit, I think these right here are my hands down favorites. In addition to using besan (chickpea flour) in the pakora batter, I added a bit of rice flour for an added lightness and crispness, and, in the interest of pumping up the mild flavor of the green tomatoes, I added a finely diced chile to the batter. The end result is nothing short of dreamy.

IMG_9526

Last Year: Homemade Multigrain CrackersCheddar Apple Cornmeal Bread, and Apple and Toasted Oat Cookies with Penuche Frosting –is anyone else noticing that all of these recipes practically scream “AUTUMN!”?

Green Tomato Pakoras

¾ cup besan (garbanzo bean flour, also called gram flour)

½ cup rice flour

1 tablespoon ground coriander

1 teaspoon ground cumin

1 small chile, finely minced, seeds removed if you are concerned about spiciness

3 tablespoons minced cilantro leaves

½ teaspoon salt

2 teaspoons grated fresh ginger

¾ to 1 cup water

3 to 4 large to medium-sized green tomatoes, sliced into rounds

vegetable oil

ghee (optional)

In a medium bowl, whisk together besan, rice flour, dried spices, chile, cilantro, and salt. Stir the grated ginger into ¾ of a cup of water, then slowly whisk the water into the besan mixture. You want your pakora batter to be thicker than pancake batter, but not so stiff that it clumps over the tomato slices. If your batter seems to thick, slowly whisk in the remaining ¼ cup of water until the batter lightens up a bit.

In a large, heavy skillet (cast iron works very well here) set over medium high heat, pour in about ¼ inch of vegetable oil, or a mixture of vegetable oil and ghee. Heat the oil until a pinch of batter dropped into it immediately begins to sizzle.

Using your fingers (seriously, don’t even bother with tongs or a fork here—fingers just work so much better), coat three or four tomato slices at a time in the besan batter. Gently place the tomato slices in the hot oil. They should sizzle and bubble immediately. Cook the tomato pakoras for about 3 minutes on each side, give or take, until the batter is deep golden brown and quite crisp. Remove tomato pakoras to a wire rack lined with a double layer of paper towels.

Serve pakoras warm or hot, with chutney or raita.

Serves 4 to 6 people as an appetizer.

Aloo Gobi Parathas

13 Jun

IMG_9033

As I may have mentioned before, my son does not like Indian food. Because of this, every Indian item I make tends to be focused on an effort to get my kid to at least taste it, and, in hope, want to eat more. Futile? Perhaps. But, believe it or not, when it comes to introducing my kid to the food of my ancestors, Indian food is the safer road to travel, being as though I am half Indian and half Scottish, and it seems much kinder to introduce parathas to an innocent child rather than force upon him the culinary horror that is haggis. Sheep’s lungs and liver boiled inside its own stomach, or flatbreads filled with potatoes and cauliflower? Parathas it is!

IMG_8994

IMG_8998

IMG_9004

IMG_9023

The dough for these parathas could not be simpler. A mixture of whole wheat flour, all-purpose flour, salt, and water, the dough requires little more than mixing, kneading, and resting, which leaves you a nice window of time to cook up the potato and cauliflower filling. I may be alone in feeling this way, but the next step—the rolling, folding, and rolling again—is one of my favorites.

IMG_9025

IMG_9026

IMG_9027

IMG_9028

IMG_9031

IMG_9035

Last Year: Multigrain Sandwich Bread and Chocolate Coconut Marble Cake

So many more Indian dishes can be found in the archives!

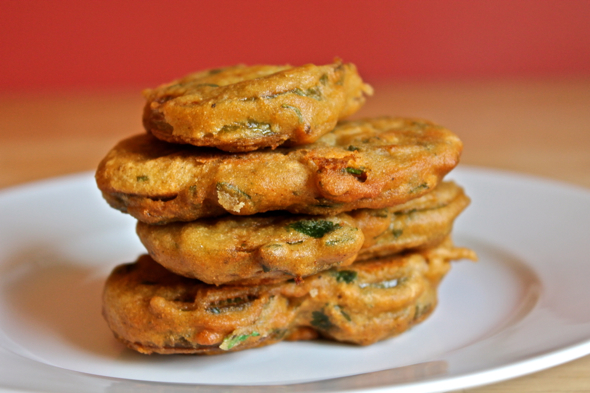
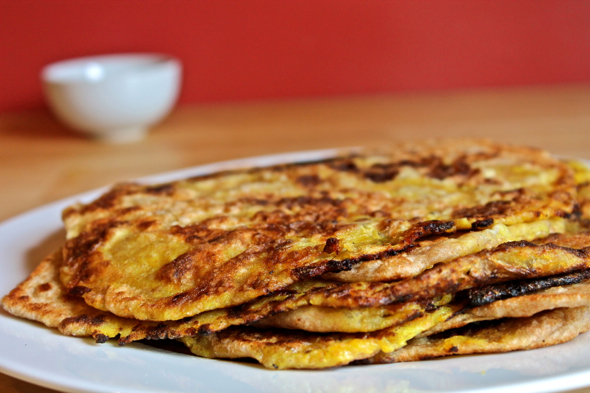
Aloo Gobi Parathas (Indian Flatbreads Stuffed with Potatoes and Cauliflower)

Dough:

1 cup whole wheat flour

1 cup unbleached all-purpose flour, plus more for rolling out the dough

1 teaspoon salt

¾ to 1 cup water

Filling:

1 medium potato (about 8 ounces)

½ a head of medium-sized cauliflower, cut into florets (about 8 ounces)

2 tablespoons vegetable oil, plus more for cooking parathas

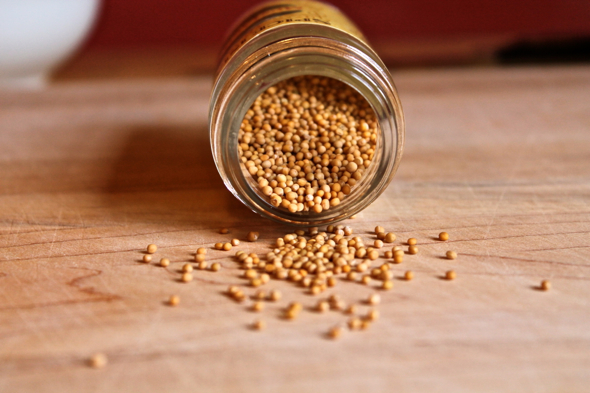
½ teaspoon mustard seeds

½ teaspoon turmeric

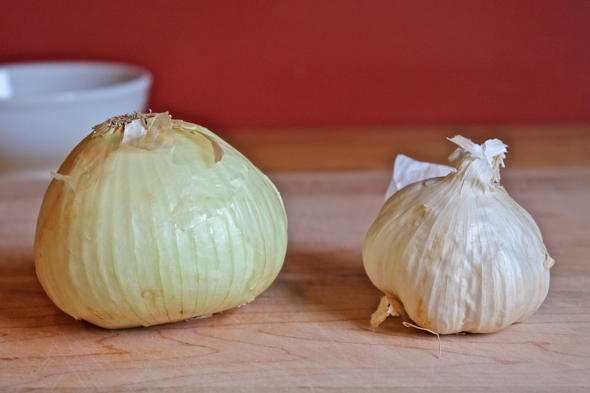
2 teaspoons minced garlic

1 cup finely chopped onion

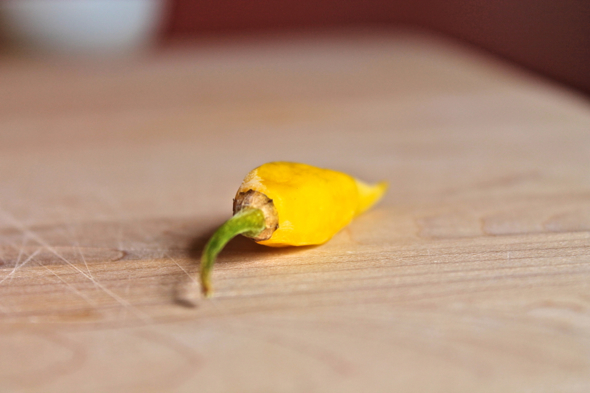
1 small jalapeno or other chile, finely minced (remove seeds and ribs before mincing to tone down the heat)

½ teaspoon salt

In a large bowl, or in the bowl of a stand mixer, combine flours with salt. Stir the flour mixture while slowly pouring in the water. The dough should need not quite the full cup of water in order to come together as a cohesive dough. Turn the dough out onto a floured surface, and knead for around five minutes, until smooth and supple. If you are using a stand mixer, mix the dough together with the dough hook, then, when the dough comes together, knead for an additional 4 to 5 minutes, until the dough is quite smooth. Cover the dough with plastic wrap and allow to rest for at least 1 hour.

While the dough is resting, make the filling.

Boil the potato, still in its jacket, until it can be easily pierced through with the tip of a knife. Set aside to cool. Steam the cauliflower florets until soft, about 8 to 10 minutes. Set aside to cool.

In a large skillet or wok set over high heat, add the vegetable oil and swirl it around until it covers the pan. Add the mustard seeds and cook for about 20 seconds, until they begin to pop and sputter. Lower the heat a tad, add the turmeric and garlic, and stir until the garlic is fragrant, about 20 seconds. Add the chopped onion and cook, stirring frequently, until the onion is soft and just beginning to brown, about 8 to 10 minutes.

While the onion is cooking, peel the skin off of the boiled potato, and add it, along with the slightly cooled cauliflower, to a large bowl. Mash the cauliflower and potato together using a potato masher or, if you have strong forearms, a fork.

When the onions have become soft and slightly browned, add the chile and stir to combine. Add the mashed potato and cauliflower mixture, sprinkle with salt, and continue to stir and cook until the mixture is completely combined. The filling should be quite soft, and only slightly tinged with brown in places. Remove the filling to the bowl in which you mashed the potato and cauliflower. Allow the mixture to cool to room temperature.

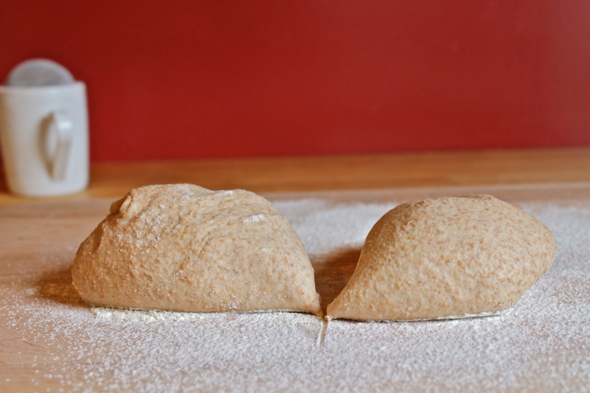
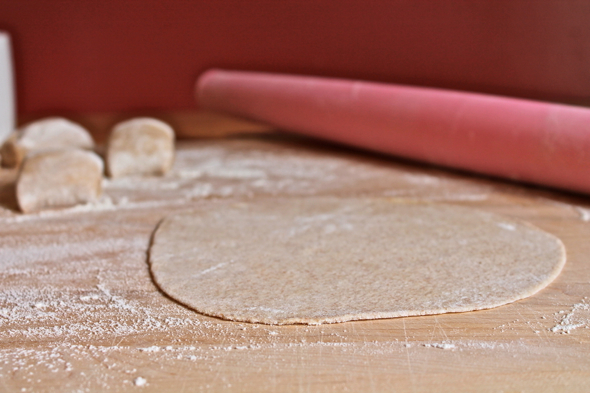
While the filling is cooling, prepare the paratha dough. Cut the dough in half, then into 8 pieces. Use your hands to flatten each piece into a disc. Coat each disc with a light dusting of flour. On a floured surface, use a rolling pin to gently roll each disc into a rough 8-inch round, setting aside and covering each circle as you roll it out. Do not turn dough over while rolling.

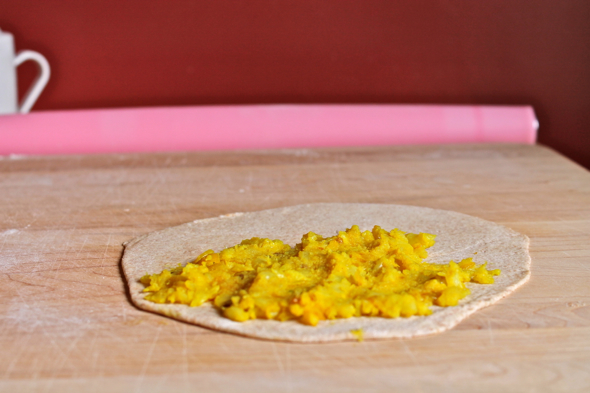
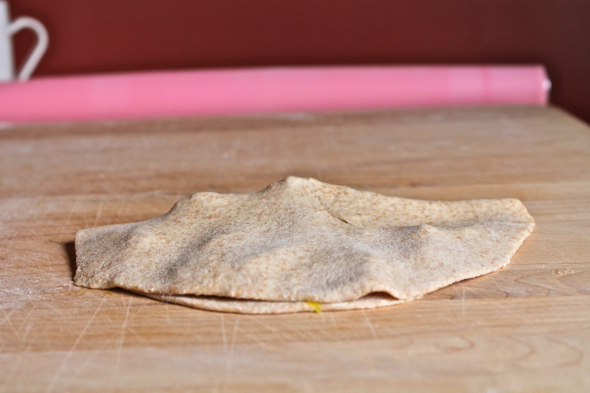
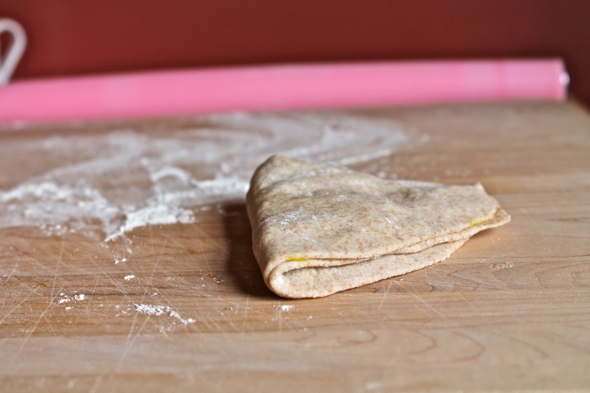
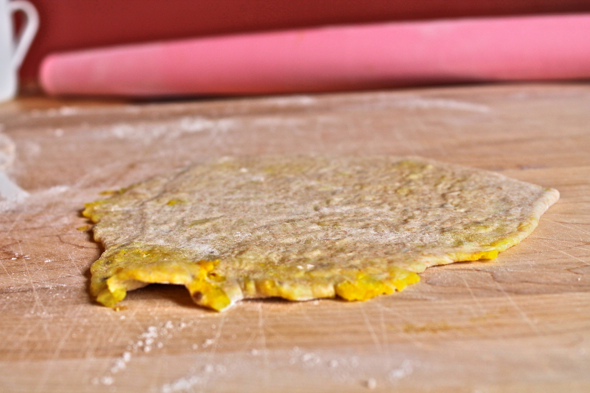
Spread 2 to 3 tablespoons of filling over one half of a dough round. Fold the bare half of the dough round over the filling, then fold in half to make a quarter-round wedge shape. Lightly pat the wedge flat, then gently roll it into a rough 8-inch round. Do not turn rounds over while rolling. Some filling will most likely sneak out the sides, but that is all right. Repeat with remaining dough rounds.

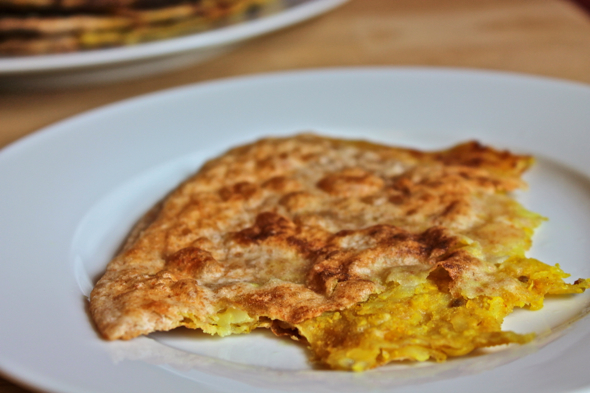
To cook the parathas, have ready a small bowl of vegetable oil of melted ghee. Heat a heavy cast iron skillet over high heat. When the skillet is hot, add a tablespoon of vegetable oil or ghee, and tip the skillet to coat it as much as possible. Lower the heat under the pan to medium-high, and place a paratha, top down, in the skillet. Cook for almost a minute, then turn the paratha over. Brush the surface of the paratha with a bit of vegetable oil of melted ghee, and cook for another minute and a half. Turn paratha over once more, and continue to cook for an additional 30 seconds, until the paratha is well spotted with brown patches on both sides. Remove to a plate, and cover to keep warm. Cook the remaining parathas in the same manner, adding another tablespoon or so of oil or ghee to the skillet in between each paratha.

Makes 8 parathas.

Indian Cashew and Pistachio Nut Brittle

17 Dec

IMG_7720

If you’ve never attempted to make candy before, I think I’ve got the perfect recipe to get you started. I know, I know—you don’t have a candy thermometer, you’re afraid of burning things (including yourself), and why would anyone make candy when you can just buy candy? I get it, really I do. But I still think you should make this.

IMG_7656

IMG_7659

IMG_7664

IMG_7666

IMG_7687

Crisp, wonderfully spiced, and absolutely jam packed with nuts, this is homemade candy at its finest and simplest. If you don’t have a candy thermometer, you can totally eyeball the doneness of the candy via its change in color while it cooks. Because I like a high ratio of nuts to sweet stuff, I made this recipe specifically with that preference in mind. The sweetness of the brittle serves mainly as a lacy structure to hold the nuts together, making every bite a perfect balance of nutty and sweet. Because a lot about the recipe is customizable, you can swap out the nuts you see here for any other nut you like. You can also swap the ginger extract for vanilla extract, the cardamom for cinnamon (or a smaller amount of cayenne pepper or chipotle powder, if you’re looking to make a sweet and spicy candy). It’s great for wrapping up and gifting to friends and family, and, if packed in an airtight container and padded against shattering, it can be shipped across the country and arrive perfectly fresh and tasty as the day it was made.

IMG_7765

Last Year: Peppermint Mocha Crinkle Cookies

Indian Cashew and Pistachio Nut Brittle Recipe

As I mentioned earlier, if you don’t have a candy thermometer, you can still make this candy. Though gauging a candy’s doneness can be accomplished by temperature, it can also be accomplished by keeping a close eye on your candy’s color and scent. I’ve added instructions below that address both temperature as well as color and scent.

Heaping ¾ cup granulated sugar

¼ cup water

¼ cup honey

½ teaspoon sea salt

1 cup raw cashews

1 cup raw pistachios

1 tablespoon unsalted butter

¼ teaspoon ground cardamom

½ teaspoon ginger extract (if you can’t locate ginger extract in your local market, it can be ordered from a baking or spice shop, such as this one)

½ teaspoon baking soda

Line a heavy baking sheet with parchment paper, then set aside.

In a large, heavy-bottomed saucepan set over low heat, combine sugar, water, honey, and sea salt. Stir with a wooden spoon until the sugar dissolves. Increase the heat to high and, without stirring, allow the mixture to come to a boil. Boil the mixture for 5 to 8 minutes, without stirring, until the mixture reaches around 260 degrees on a candy thermometer, or, if you don’t have a candy thermometer, until the mixture turns a deep amber color. When the desired temperature or color are reached, immediately stir in the nuts and stir the mixture constantly until it reaches a temperature of 310 degrees or, if you don’t have a candy thermometer, when the mixture turns a deep golden shade of reddish brown and you can smell the nuts toasting and the sugar becoming deeply caramelized.

Immediately remove the pan from the heat, then stir in the butter, cardamom, and ginger extract until evenly incorporated. Add the baking soda (the mixture will bubble and foam for a bit, then reside) and stir until combined. Quickly pour the mixture onto the prepared baking sheet, pouring it around as evenly as possible. Do not bother trying to scrap the last bits of the hot, sugary mixture from the sides of the pan. Gently push the mass of nuts around so it covers as much of the surface of the candy as possible.

Allow the candy to cool completely before breaking into bits and eating or packaging. If you want to speed up the cooling process, you an place the sheet of cooling candy in the freezer and cut your cooling time in half.