Tag Archives: tart

Blackberry Lime Tart

19 Jul

IMG_9124

IMG_9114

IMG_9112

As I imagine it is with most people in the PNW, I have a seriously tense, love/hate relationship with blackberries. Himalayan blackberries are a scourge to gardens and yards all over the city this time of year, their prickly vines and tentacle-like roots popping up and taking hold every single place you don’t want them to be. These blackberry vines have been known to destroy public parks, obliterate native plants, and—god help me—produce some of the most delicious free fruit you’re likely to taste on this side of the country.

IMG_9115

IMG_9120

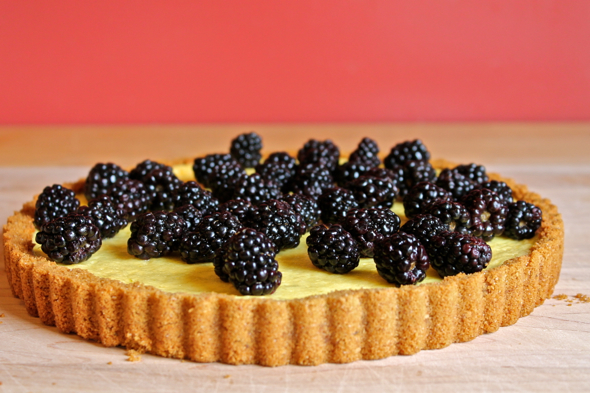
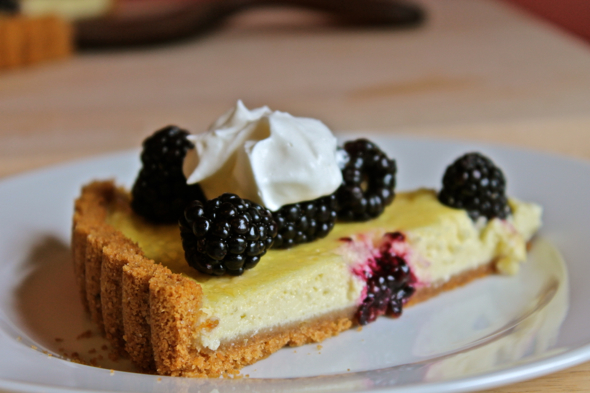
This tart is a summer dream, hitting all the right notes with its zingy lime zest, perfect berries, creamy mascarpone and yogurt filling, and a wonderfully crumbly, barely sweetened crust to pull everything together.

IMG_9128

Last Year: Watermelon, Cucumber, and Feta Salad with Mint and Tangerine Zucchini Bread

Blackberry Lime Tart

 Crust:

Generous 1 cup of graham cracker crumbs (from about 16 graham cracker squares)

3 tablespoons unsalted butter, melted

1 tablespoon sugar

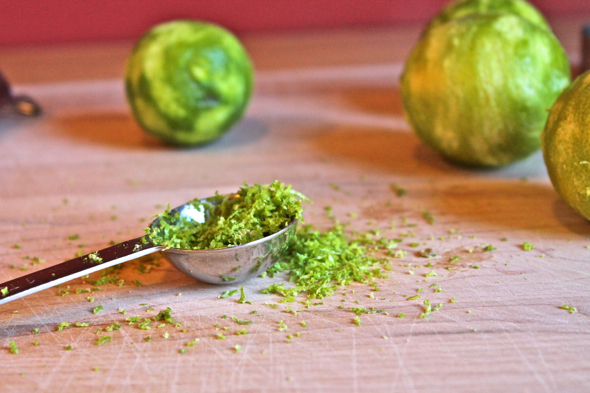
½ teaspoon finely grated fresh lime zest

pinch of salt

Filling:

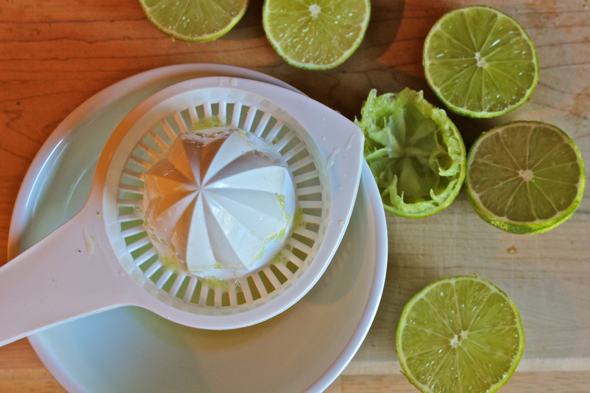
¼  cup freshly squeezed lime juice

1 tablespoon finely grated fresh lime zest

1/3 cup sugar

1 tablespoon flour

¾ cup plain yogurt

3 ounces (about 1/3 cup) mascarpone cheese (you could also use cream cheese)

3 large eggs

pinch of salt

1 to 2 cups of blackberries

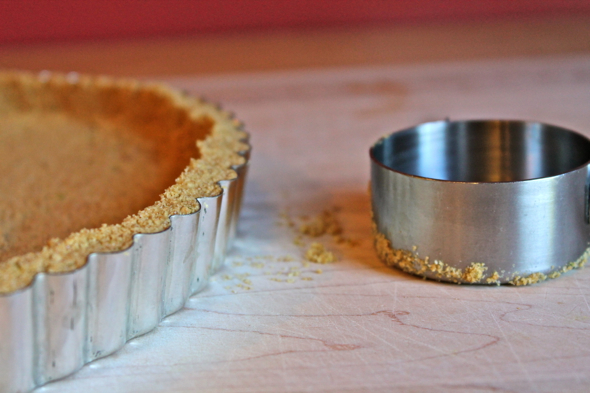
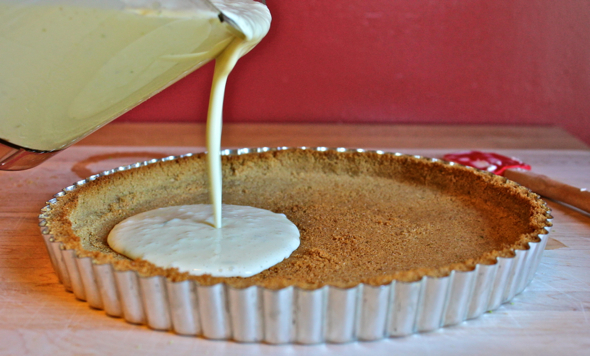
Preheat oven to 350 degrees Fahrenheit. In a medium bowl, combine graham cracker crumbs, melted butter, sugar, lime zest, and salt. Stir until the butter is completely incorporated. Press the crumbs into a 10-inch tart pan, trying to keep the thickness of the crust as uniform as possible (if you can’t don’t worry—an uneven crust has never brought a pox upon anyone and their family). Bake the tart crust in the oven for 10 minutes, until it just begins to barely brown at the edges. Remove and set aside while you make the filling.

In the bowl of a food processor or blender, combine lime juice, lime zest, sugar, flour, yogurt, mascarpone or cream cheese, eggs, and pinch of salt. Process until smooth, scraping down the sides of the bowl as necessary. Pour the filling into the tart crust, and bake in the center of the oven until the top of the tart has puffed up and the middle has set, about 30 to 40 minutes, checking the tart consistently after the 30 minute mark to make sure it doesn’t burn. The top should be just touched with golden spots.

Remove the tart from the oven, then immediately sprinkle on the berries. The top of the tart will sink a bit, and the berries will gently sink in along with them.

Refrigerate the tart until chilled through, at least 2 hours, or overnight. Serve with whipped cream, if desired.

Makes 1 10-inch tart, enough to serve 8 to 10 people.

Pear Nougatine Tart

21 Dec

Overlooking the obvious can lead to rather surprising results.  Sometimes those surprising results are of the pleasing variety, like when you realize that the only reason you get food from an otherwise sub-par taqueria is because of the fact that they have a salsa bar that offers the world’s most incredible habanero salsa.  When you realize this, you then go home and make your own batch of habanero salsa, freeing you from the clutches of the not-so-great Mexican food you’ve been eating just to serve as a base for the salsa in question.  Problem solved!  (And the you in question is, in fact, actually me, in case anyone didn’t pick up on that right away.)

Other times, overlooking the obvious can lead to surprisingly disappointing results, like when I decided to make a particular tart that was so named for the fact that it was topped with candy, not fully realizing that, lady, you’re about to top a tart with candy, which means that things are going to get really, really sugary around here.

Yes, when I first made this tart, I lamented the fact that it was far, far too sweet for my tastes.  At first I couldn’t figure out why, because I was too focused on the tart’s other, more pleasing, qualities (like, for instance, the shot of lemon that wakes up every other flavor, or the small splash of cream that I added to the pear caramel to round everything out), but then, looking back on the recipe, and, you know, its name, it suddenly occurred to me that I had just made a tart topped with candied nuts.  So, that’s going to be sort of sweet.

Because of this, I actually debated whether or not to share my experience with this recipe, not being sure if I wanted to highlight something that I thought needed its sweetness dialed back so severely.  In the end, realizing that the rest of the recipe is fairly delightful, it seemed like the recipe did need to be shared, albeit in a somewhat less-sweetened form.  And even though I swapped out the original recipe’s call for apples with my own penchant for pears, and I ever-so-slightly altered the pears’ cooking method in order to get a more usable sauce in the end.  Okay, so there is a fair amount that I changed about this recipe, but only because I had a hunch that what I found to be almost perfect could, with a bit of fiddling, be made to shine.  And at the risk of sounding like a weird pageant mom, I think that bit of polishing has rendered this tart now ready for its close-up.

Pear Nougatine Tart

Adapted from Tartine

Fully baked 10-inch tart shell (recipe here, only for a fully baked tart shell, bake the shell for a total of 30-35 minutes, 20 minutes with pie weights, and 10-15 minutes with the foil and weights removed, until the crust is golden brown)

Pear filling:

3 pounds just ripened pears (over-ripe pears will fall apart when cooked, so make sure your pears still have a bit of firmness to them), peeled, cored, and sliced into quarters

¼ cup (4 tablespoons, or 2 ounces) unsalted butter

¼ cup (4 tablespoons) sugar

pinch of salt

2 tablespoons heavy cream

lemon juice and grated zest of ½ a medium lemon

Topping:

1 cup sliced almonds

¼ cup sugar

2 large egg whites, lightly beaten

pinch of salt

Preheat oven to 350 degrees Fahrenheit.  Place fully baked tart shell on a baking sheet and set aside.

Have a large bowl ready to hold the sautéed pears.  You will be sautéing the pears in 4 batches, so divide the pears as needed.  In a heavy sauté pan, melt 1 tablespoon butter over medium heat.  Add 1 tablespoon of sugar and allow it to just caramelize with the butter, turning a medium brown.  Add 1 batch of the pears to the pan in a single layer.  Saute until soft, turning a few times with a spoon.  If the sugar begins to darken too dramatically, reduce the heat to low.  The pears should become quite soft and caramelized as they cook, but still hold their shape.  The timing of this will depend on the ripeness of your pears, but it should not take more than 5 minutes.  When the pears are caramelized and soft, transfer them to the waiting bowl.  Add another tablespoon of butter and sugar to the pan, not cleaning the pan between batches.  Add another batch of pears, and cook as you did the first batch.  The second batch should not take as long as the first.  Continue with the remaining batches of butter, sugar, and pears, adjusting the heat as necessary to keep the caramel in the pan from burning.

When all of the pears have cooked, the caramel remaining in the pan should be quite dark.  Increase the heat under the pan to medium high, then deglaze the pan with 3 tablespoons of water, scraping up the bubbling caramelized bits with a wooden spoon or a wire whisk.  When most of the bits from the pan have been loosened, add the heavy cream and continue to stir or whisk until the liquid has reduced by about 1/3.

Pour the reduced caramel and cream mixture over the sautéed pears, then toss to combine.  Add the lemon juice, lemon zest, and salt to the pears, then toss once more.  Pile the pears into the baked tart shell.

To make the topping, combine the almonds, sugar, egg whites, and salt in a small bowl.  Stir well to combine.  Spread the almond mixture evenly over the pears, extending the topping all the way to the edges of the tart.

Bake the tart on a baking sheet, in the middle of the oven, until the topping is browned, about 30 minutes.  Transfer to a wire rack to cool completely before serving.

Salted Chocolate Hazelnut Tart

19 Dec

Sometimes the best gifts arrive before Christmas.  My husband’s auntie and uncle, they of the cider press, are in the habit of buying large quantities of hazelnuts.  They are also in the habit of sharing their haul of hazelnuts, which is one of the many qualities they possess that I greatly enjoy.

You may notice that when I get my hands on a certain ingredient, recipes that involving that ingredient tend to take over the site for a while.  When the strawberries start producing, the tomatoes ripen, and markets everywhere start offering fresh pears, I tend to focus pretty hard.  Garden fresh vegetables and fruit are only available for a short period of time, so why not settle down with them for a bit?  Predictably, things were no different with me this time around, so as soon as I opened the big tin of nuts and saw what was inside, my mind immediately began to buzz with possibilities.

I’ve never been great at meal planning, and I think the creation of this tart points towards one of the main reasons I struggle so much to look an entire week or more ahead when it comes to thinking about what I am going to cook.  I like inspiration, and when every time I have sat down to plan a week’s worth of meals, my plans undoubtedly become derailed by the spotting of something at the market that just called to be brought home.  Maybe delicata squash wasn’t on my grocery list, but when I see the first fall squash of the season, chances are I am going to go all swoony and buy it.  While I wasn’t anticipating having a large amount of hazelnuts sitting around my house, I sure was glad to see them when they arrived.

And while I subsequently may not have known at the time that I really, really wanted to make a baked chocolate tart topped with flakes of sea salt and savory hazelnuts, I sure was pleased to see it come together a few days later while I literally made things up as I went along, led by the promise of something incredible.

Some of you may recall that I have very recently made another chocolate hazelnut tart.  That tart, with its creamy, pudding-like filling made from hazelnut milk, is an entirely different animal.  The heft in that tart comes from its graham flour crust, while the filling is soft, light, and faintly scented of hazelnuts.  This tart almost functions as the reverse of that tart, with the buttery shortbread crust serving as the crisp counterpart to the dark, deep, bittersweet chocolate filling topped with flavorful toasted hazelnuts and the unexpected bite of sea salt.  While I might be tempted to call the previous chocolate hazelnut tart subtle, I would never even think of accusing this tart of being as such.  It’s CHOCOLATE and HAZELNUTS rendered BOLD, in ALL CAPS, and it demands your attention, straightaway.

Salted Chocolate Hazelnut Tart

I like a lightly salted bite, so I sprinkle only a modest amount of sea salt on this tart.  If you are in search of a more pronounced salty flavor, by all means, add a bit more.  I have included options for  both less salty and more salty preferences in the recipe.

1 partially baked sweet tart shell (this is a great sweet tart crust that I love to pair with this type of tart)

1 cup whole hazelnuts

5 ounces bittersweet chocolate, coarsely chopped

½ cup (1 stick) unsalted butter, cut into 1-inch chunks

¼ cup Dutch processed cocoa powder

pinch salt

1 teaspoon pure vanilla extract

3 tablespoons heavy cream

3 large eggs

1/3 cup sugar

1/8-¼ teaspoon flakey sea salt

Preheat oven to 325 degrees Fahrenheit.

Place hazelnuts on a baking sheet, and toast for 10 to 15 minutes, until you see the skins begin to curl up slightly and come loose.  Place the nuts in a clean dish towel, fold the towel over the nuts, and vigorously rub the towel around, sloughing loose the hazelnut skins.  Continue to rub the hazelnuts in the towel until most of the skins have come free.  It is perfectly fine if some skins remain intact.  Very coarsely chop hazelnuts, mostly to cut them in half, then set aside.

In a double boiler, or in a heat-proof bowl set over a pot of simmering water, combine the chopped chocolate, butter, cocoa powder, and pinch of salt.  Slowly stir until the ingredients have melted together, then stir until well mixed.  Remove from heat and stir in the vanilla and heavy cream.

In a large bowl, or in the bowl of a stand mixer, beat the eggs and sugar until light and ribbony, about 3-5 minutes.  Very slowly pour the slightly cooled chocolate mixture into the egg mixture, beating as you pour.  Beat for 1 minute to combine completely.

Pour chocolate mixture into the parbaked tart shell.  Place tart on a baking sheet, and bake in the middle of the oven for 20 minutes, until the chocolate filling has just begun to set.  Remove the tart from the oven while still on the baking sheet, scatter the hazelnuts over the top of the partially baked tart, press them very gently into the filling, then return to the oven to bake an additional 15 minutes, until the edges of the tart appear a bit dry and have started to crack.

Remove tart from oven.  Sprinkle your desired amount of sea salt evenly over the top of the tart.  Cool on a wire rack for at least 45 minutes.  The tart will appear quite puffed up when you first remove it from the oven, but it will sink as it cools, allowing the hazelnuts to nestle in quite nicely.

If desired, top with unsweetened whipped cream flavored with just a hint of vanilla.