Archive | Snacks RSS feed for this section

Homemade Granola Bars

11 Apr

IMG_8761

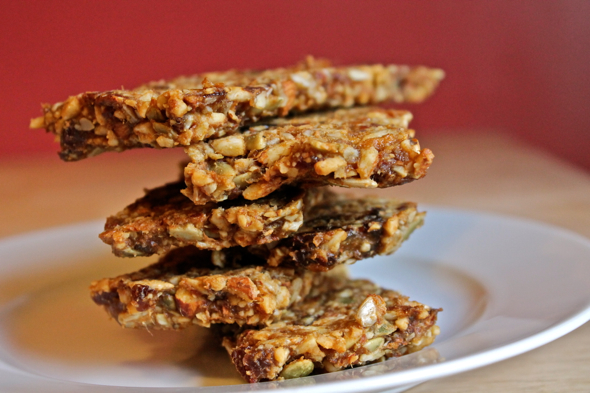
If I were to tell you straight off the bat that these granola bars were made of whole grains, dried fruit, healthy nuts, and no added sugar or sweeteners, you would probably roll your eyes at me and then refuse a taste of what could only be an exercise of virtuous, boring, tasteless snacking. This would be a mistake, of course, because refusing a taste of one of these delicious granola bars is akin to refusing yourself a…well, a taste of a delicious granola bar. A really, really delicious granola bar.

IMG_8747

IMG_8748

IMG_8752

IMG_8756

IMG_8759

Sweetened with pulverized dates and a hit of fresh, unfiltered apple cider (which is merely unfiltered apple juice, for all you Europeans out there), there is nary an extra sweetener included in these fellows. What is included in these granola bars, however, is a whole lot of stuff that is very good for you, and also has the added benefit of tasting good. It’s not all that often that you can find a place where those two distinctions overlap. Take advantage of that knowledge and put these to work right away.

IMG_8764

Another take on homemade granola bars (although a thicker, sweeter, heartier option) can be found here

Last Year: Cider-Braised Greens and Roasted Fingerling Sweet Potatoes with Lemon Tarragon Aioli

Homemade Granola Bars

2 cups oats (not quick-cooking oats)

½ teaspoon ground cinnamon

½ teaspoon sea salt

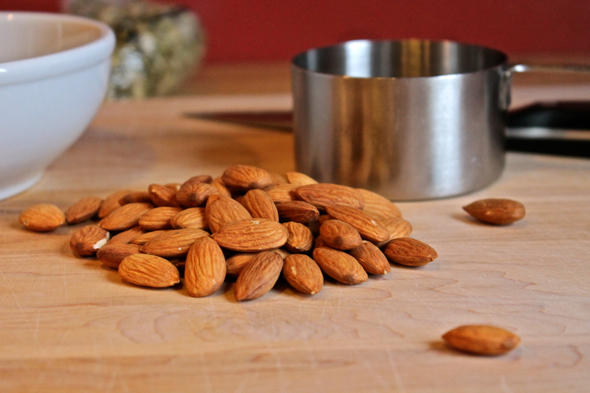
1 cup roughly chopped nuts or seeds of your choice (I used almonds, pepitas, and sunflower seeds)

½ cup dried fruit of your choice, roughly chopped to be of similar size to the nuts (I used chopped dried apricots, but raisins, dried cherries, or dried blueberries would also be good)

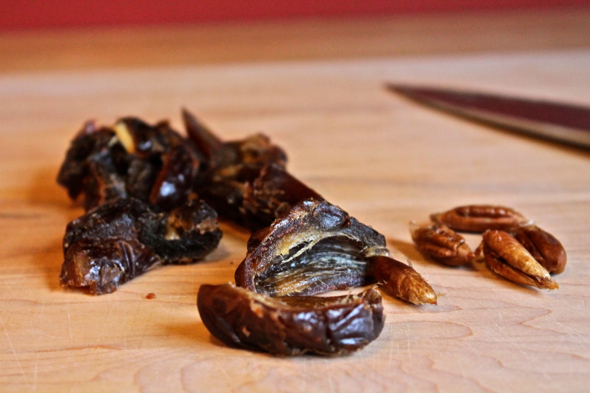
1 cup pitted whole dates (plain, with no added sugar)

¼ cup unfiltered apple cider (also called unfiltered apple juice)

1/3 cup almond butter

1 tsp pure vanilla extract

2 tablespoons vegetable oil

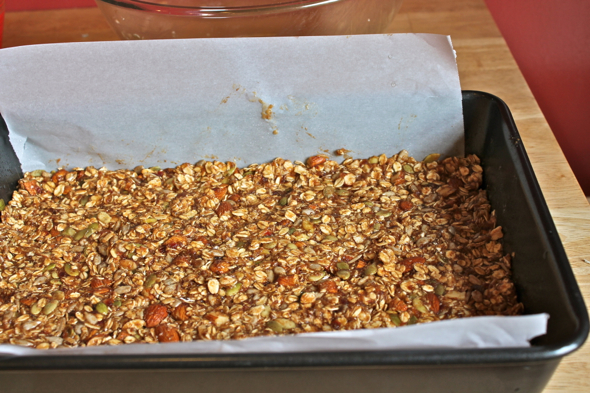
Preheat oven to 350 degrees Fahrenheit. Line a 9” by 13” baking pan with a sling of parchment paper, then slightly spray or brush the pan and paper with vegetable oil.

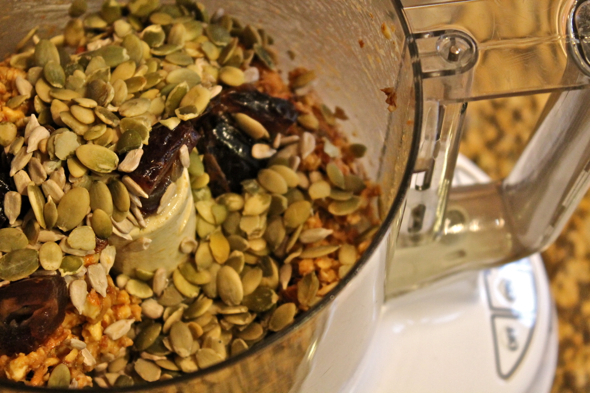
In a large bowl, combine the oats, cinnamon, sea salt, nuts, and dried fruit. Toss to combine.

In the bowl of a food processor or blender, combine the pitted dates and apple cider. Pulse until the mixture forms a thick paste, with some visible chunks of date still remaining.

In a medium bowl, combine date and cider mixture with almond butter, vanilla, and vegetable oil, then whisk to combine. Pour wet mixture over oat mixture. Using a spatula or wooden spoon, stir the ingredients together until they are thoroughly combined.

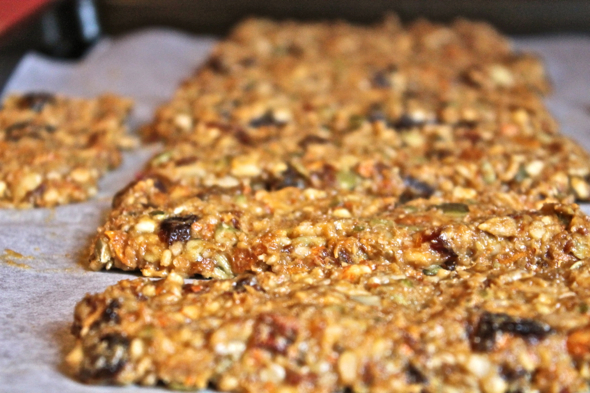
Pour the mixture into the prepared pan. Wet your hands, then pat the mixture into the pan, pressing it down into the edges and corners. The mixture will really, really want to stick to your hands, so keep rewetting your hands as necessary until you’ve flattened the mixture completely into the pan.

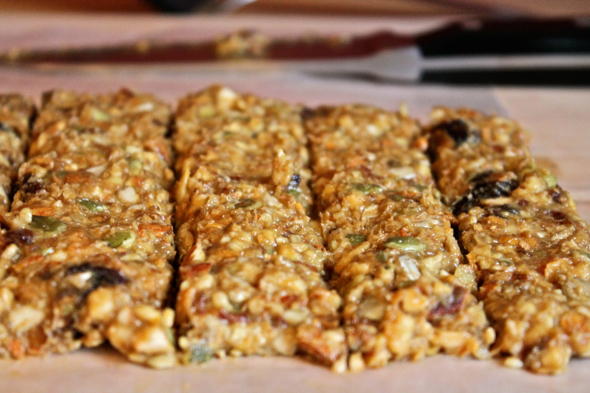
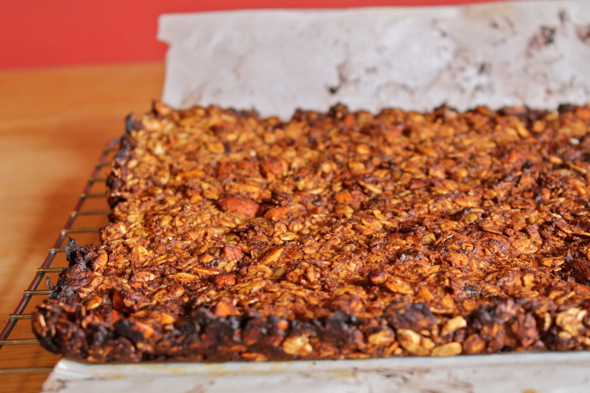
Bake in the center of the oven for 20 to 25 minutes, until the edges are golden brown. I baked the batch pictured above for far too long, so it is overly darkened at the edges. Don’t make the same mistake.

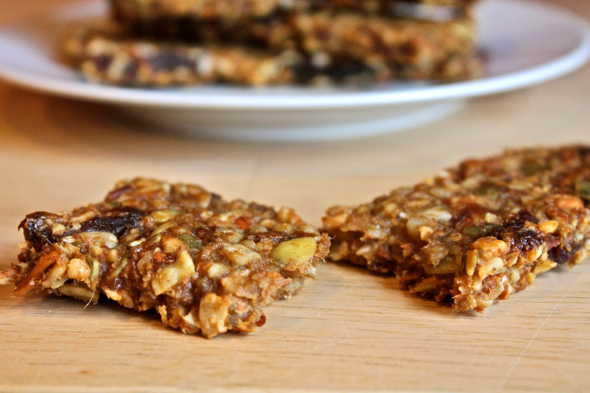
Allow the bars to cool for at least an hour before attempting to cut them. Cutting with a large serrated knife (like a bread knife) works best for these. The granola bars will keep in an airtight container at room temperature for about a week, but they will keep indefinitely if kept in an airtight container in the freezer.

Homemade Energy Bars

24 Jan

IMG_8328

IMG_8309

IMG_8312

IMG_8315

IMG_8317

IMG_8319

I, the person who has never actually seen an energy bar, have made you some energy bars. Actually, what I have made is not so much an energy bar, as it is what I think an energy bar should be. It is packed with protein, filled with fruit, and it contains no gluten or grains (not because I don’t eat gluten or grains, but because I thought people might like having the option of an energy bar without those things in it). It is just about as friendly and harmless a snack as anyone could ever wish for, only these suckers are also super delicious. Like, almost dangerously so. I’ve taken to eating one just about every other waking hour, which means that I am going to have to start preparing for some hiking or power-biking pretty soon, lest I waste the virtues of these energy bars on my current low energy activities of sitting, typing, and reading.

IMG_8332

Last Year: Yard Long Beans with Chile Oil and Garlic Bits and Ponzu-Marinated Flank Steak

Homemade Energy Bars

These little bars are basically little more than a collection of fruits and nuts all ground together and then baked a bit to keep their shape. The recipe below was based on whatever seeds, nuts and dried fruits I had sitting around in the house, but I’d encourage you to use whatever combination of flavors you think would be good. I think dried, unsweetened coconut would be great in here, as would dried apricots, dried apples, or dried, unsweetened cherries.

¼ cup unfiltered apple cider

½ cup whole Medjool dates, cut into quarters, seeds removed

½ cup dried mangoes

½ cup dried pears

1 cup whole raw almonds

¼ cup raw pepitas (pumpkin seeds)

¼ cup raw sunflower seeds

¼ teaspoon sea salt

Preheat oven to 300 degrees Fahrenheit. Line a baking sheet with parchment paper, then set aside.

In a medium bowl, combine apple cider, dates, dried mangoes, and dried pears. Toss to combine, then allow to sit and soak for a bit while you gather the remaining ingredients.

In the bowl of a food processor, combine soaked dried fruits (along with any apple cider remaining in the bowl) and almonds. Pulse 5 or 6 times to coarsely chop everything. Add the pepitas, sunflower seeds, and salt, then pulse half a dozen more times until the mixture sticks together and begins to clump up. There should still be big chunks of seeds and nuts visible.

Turn mixture out on to a large sheet of wax paper. Wet your hands with water (to prevent the mixture from sticking to your hands too much), then shape the mixture into a 12” by 6” rectangle. Cut the rectangle into 8 bars that are roughly 6” by 1.5” a piece. Using a flexible spatula, transfer bars to parchment-lined baking sheet. Bake in center of oven for 10 minutes, then carefully turn each bar over and continue to bake for an additional 8 to 10 minutes. The bars should be slightly golden, but the nuts should not be singed or burned.

Remove from oven, and allow bars to cool on baking sheet. Store in an airtight container for 3 days at room temperature, or in the refrigerator for up to a week. Or just eat for breakfast, lunch, and dinner, and never find it necessary to store them anywhere for any prolonged period of time.

Crispy Roasted Masala Chickpeas

26 Nov

These crispy, spicy chickpeas take absolutely no time to throw together, and they make a wonderful snack, garnish, or added protein, whether you’re looking for something snacky or something to plump up a meal. My current favorite way to eat them (aside from just eating them as they are, which is simply wonderful) is to throw them on a pile of quinoa, chopped raw spinach, and avocado, then drizzle everything with a touch of balsamic vinegar and olive oil. The spices are just perfect and the tiny kick of heat makes for a nice surprise.

Last Year: Slow-Cooked Beans and Huevos Rancheros

Crispy Roasted Masala Chickpeas Recipe

2 tablespoons olive oil

1 ½ cups cooked, drained chickpeas

2 teaspoons garam masala (a commonly found Indian spice blend)

¼ teaspoon chili powder (or cayenne pepper, if you want things a little spicier)

salt and pepper to taste, if needed

Preheat oven to 400 degrees Fahrenheit.

Heat a large oven-proof skillet over high heat. Add olive oil, then add drained chickpeas. Sprinkle over garam masala and cayenne pepper, and stir to combine. Sauté the chickpeas and spices, stirring occasionally, for 2 minutes, then place the skillet in the heated oven. Roast the chickpeas in the oven for 15 to 20 minutes, until they are crisp and golden. Taste for seasoning, and add a bit of salt and pepper if you think it is necessary (garam masala spice blends contain different levels of salt, so it is important to hold off on adding more salt until after the chickpeas have been roasted).

Eat the chickpeas as is, or add to salads or soups.